KB Article #278
A parts transaction received in CollisionLink can be processed within minutes. Be sure to keep these items in mind when processing your transactions:
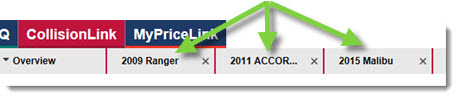
- Transactions are opened in a new tab within CollisionLink. This allows you to work on multiple orders at the same time, simply by clicking a different tab.
- Only move parts to the Response to Buyer section if you plan to quote or fulfill them.
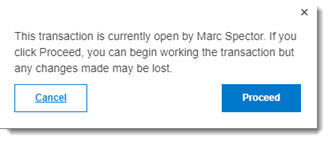
- An alert message will display if the transaction is currently open by another salesperson at your dealership or by the shop that sent the transaction.
- Information added to the OE Parts section can be saved at anytime by clicking Save.
- You can use the Respond to Buyer button to keep the shop informed of the status of their order, especially if parts are back ordered.
Watch a short video on how to process an order in CollisionLink!
Step 1: Locate New Transactions on the Overview
New part transactions display on the CollisionLink Overview tab. Double-click to open its details.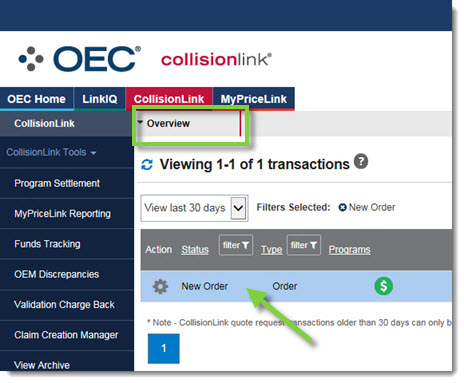
Note: A pop-up window may display if this shop has not been set up as a Trading Partner. (Click here to learn more.)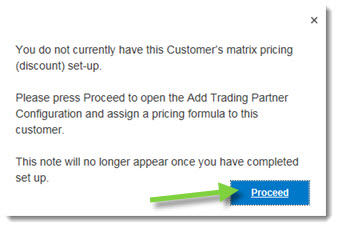
Step 2: Review the non-OE Parts
CollisionLink automatically captures aftermarket, remanufactured, salvaged, and other non-OE parts lines included in a shop's order--giving you the chance to take advantage of automaker programs and offer competitively-priced OE parts as an alternative. You can find these non-OE parts in the Upsell Parts section. (Click here to learn more about taking advantage of these opportunities.)
- If available, determine the shop's desire for the part by reviewing the Buyer Request column. Buyer requests in the Upsell Parts section will have one of the following statuses:
- Quote: The shop would like a quote for the OEM equivalent of the non-OE part.
- OEM Accepted: The shop has accepted the Upfront Price for the OE part and would like to order it. Note: Upfront Pricing is not yet available to all subscribers. Watch for future communications from OEC as it becomes available in additional markets.
- Do Not Process: The shop does not need this part line fulfilled.
- Verify the OEM part number in the OE Part # field. (Type the OEM part number in this field if blank or incorrect, if needed.)
- Propose a competitive Sell Price for the OE Part.
- Add parts you want to provide a quote for or fulfill to the Response to Buyer section by clicking on the arrow (
 ) to the right of the totals bar. Note: Only parts with a checkmark (
 ) will be added to the Response to Buyer section.
Step 3: Verify OE Parts
OE parts ordered by the shop can be found in the OE Parts section. 
- To ensure the specified parts are appropriate for that vehicle’s make, model, and year, verify the Part # is correct.
- Parts with a green checkmark (
 ) have been validated.
 - When a requested part number has possible alternates, a yellow icon (
 ) displays. Click Revised Part # to view and select an alternate part. (If needed, click Additional Info to access part-catalog information, description, program information, and validation status of alternate parts.)
 - Parts with a red icon (
 ) can be corrected by typing the part number in the Revised Part # box.
 - Parts not found in the catalog will display a blue question mark (
 ).
).
- Parts with a green checkmark (
- Review the Pricing Information for each part to understand how your discounts impact the price--and your profit on the part.
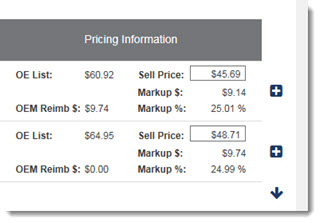
- Parts that qualify for reimbursement will display an OEM Reimb $ based on the Sell Price.
- The Sell Price is based on the CollisionLink pricing formula set up for the shop.
- Your profit for the part will display in the Markup $ field. Changing the Sell Price will cause this field to change.
- Once parts have been verified, click the
 to add a single part to the order or use the
  to add all parts. Added parts drop to the Response to Buyer section where you can finalize the order.
 - Once all parts are added, you are ready to provide quotes, invoice, and finalize your order.
Step 4: Finalize the Order
All parts selected will display in the Response to Buyer section. 
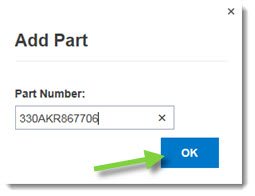
- If you need to include additional parts on the order, click Add Part. Type the part number and click OK. If you have added a part, the line number will begin with CL. Note: This functionality is currently not available on orders received from ProfitNet.
- Confirm the Pricing Information for each part, making changes where needed. Parts added to the Response to Buyer section that were not found in the catalog or added manually will need the following Pricing Information completed in order to proceed:
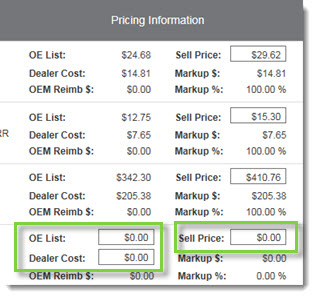
- OE List
- Dealer Cost
- Sell Price
- If any of the sell prices need to be recalculated because they don't qualify for a typical shop discount (air bags, etc.), click inside the Sell Price field and select the correct pricing formula. (Click here for more information.)
- If you are unable to fulfill the shop's quantity requested (Qty Req.), type the amount you can provide in the Qty Ful field.
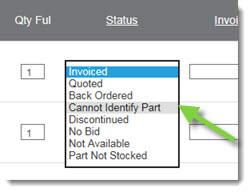
- If there is a part that cannot be invoiced or quoted, change the Status drop-down box. This lets the shop know why a part can't be invoiced. (Click the Status column heading to change the part status for every part on the order, if needed).
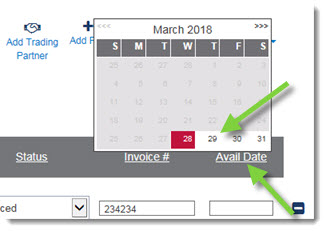
- Assign a delivery date for each part:
- Click the Avail Date column header and select the date from the calendar. All part lines will be assigned the selected delivery date. Note: You cannot select a date prior to the current date.
-or-
Click inside the Avail Date field and select the date from the calendar to assign a delivery date to a specific part.
- Click the Avail Date column header and select the date from the calendar. All part lines will be assigned the selected delivery date. Note: You cannot select a date prior to the current date.
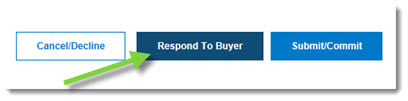
- Click Respond To Buyer if you want to send the part availability and pricing information back to the shop. Note: Shops that use ProfitNet or Mitchell RC cannot close orders on their end without this information. Always click Respond to Buyer on transactions labeled as ProfitNet or Mitchell RC.
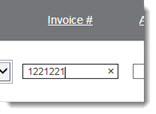
- Once you have fulfilled the transaction and generated an invoice, return to the transaction to include the invoice number.
- To assign the same invoice number to all invoiced parts, click Invoice # at the top of the column, type the invoice number into the box, and then click OK.

- To assign the invoice number to a single part, click the invoice number box for that line item and type the number for that part.
- To assign the same invoice number to all invoiced parts, click Invoice # at the top of the column, type the invoice number into the box, and then click OK.
- When you are ready to finalize the transaction, click Submit/Commit.
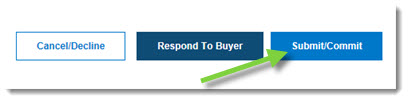
- The transaction has now been completed and its information has been sent to the shop. (You will not be able to make changes after you click Submit/Commit .)
- If any parts were left with a Status of Quoted, the Quoted Parts warning message will display. Click Go Back to return to the Order Details window or click Submit to fulfill the transaction without making changes.
- If there are program-eligible parts that you are submitting for reimbursement, a new window will display:
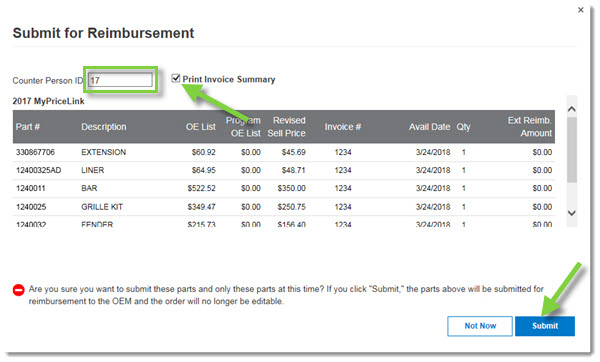
- Verify that all parts listed should be submitted for reimbursement and make sure that the invoice number and delivery date are filled in.
- Verify the Counter Person ID and check Print Invoice Summary if you have not already printed it.
- Click Submit to process the reimbursement.
Notes:
- If applicable, Program Submission Expiration information will display at the top of the Submit for Reimbursement window. Parts being submitted beyond the expiration date displayed will not be reimbursed.
- Unverified parts are missing required information to submit. To correct, return to the transaction and add the parts availability date and/or the DMS invoice number for each unverified part.
- Not all OEMs allow reimbursements to be submitted through CollisionLink. Nissan, for example, has separate reimbursement processes.