KB Article #1528
With ConsumerLink, you can easily configure the appearance of your storefront by selecting one of OEC's predesigned templates or you can upload your own. Changes are updated in real-time (once you click Save) allowing you to tweak the design until you're satisfied with your layout. Note: ConsumerLink Setup options can only be accessed by the ConsumerLink Administrator.
If you are integrating the ConsumerLink storefront (as an iFrame) into your existing website and you do not want to include ConsumerLink's dealer branding options, uncheck the Dealer Branding box.
To select a design for your storefront:
- From the ConsumerLink tab, click ConsumerLink Setup.
- Click the I want to: drop-down and select Select a Store Template.
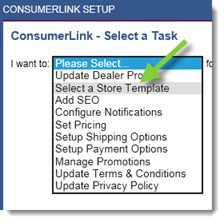
- Select your OEM from the OEM drop-down.
- Click OK to display the store template configuration fields.
- Select a template from Default Templates by clicking the button underneath the design you wish to use. You have 14 designs to choose from or you can upload your own image. Use the arrows to look at the different templates.
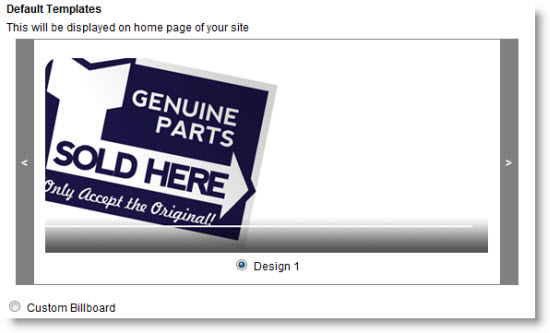
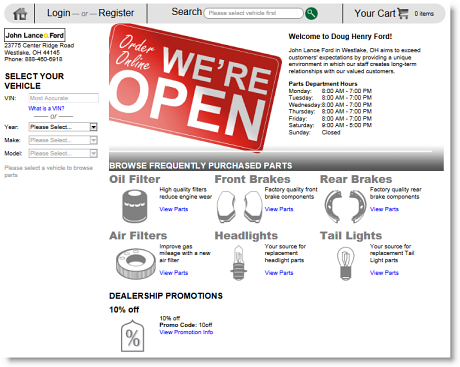
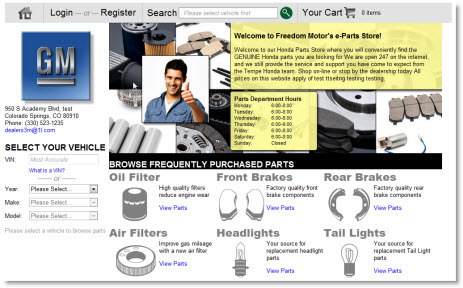
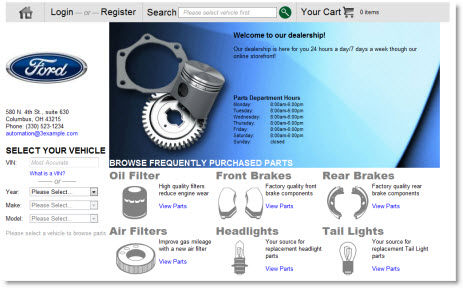
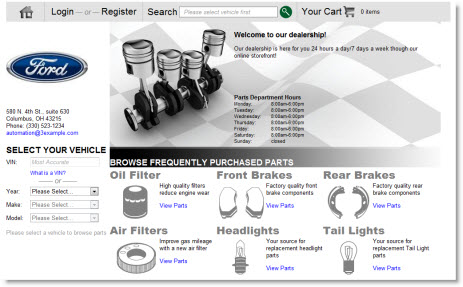
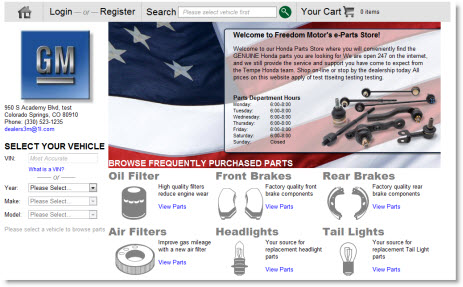
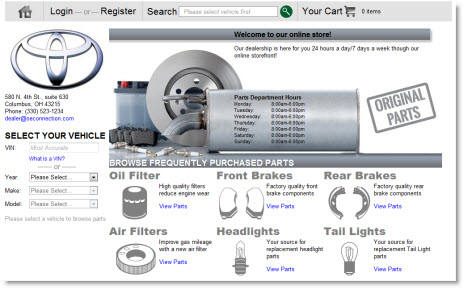
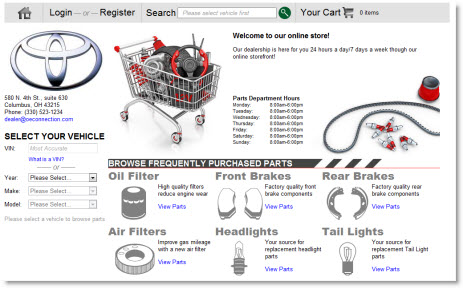
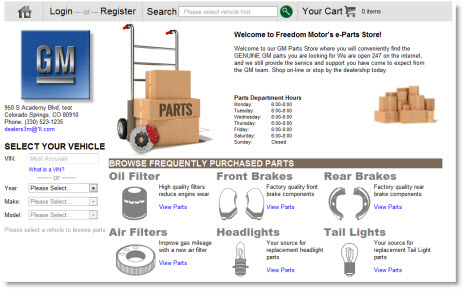
The following table shows the change in the storefront based on the design you select:
If you choose this..
...Your website will look like this: Design 1
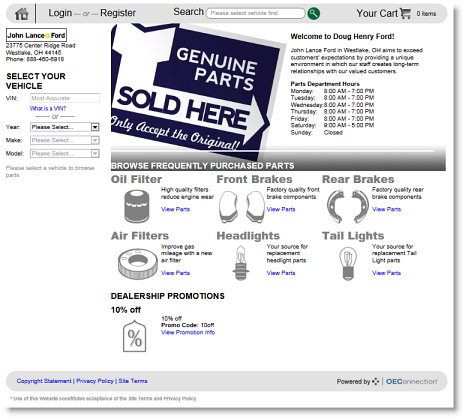
Note: This design will be selected and applied to your storefront by default.
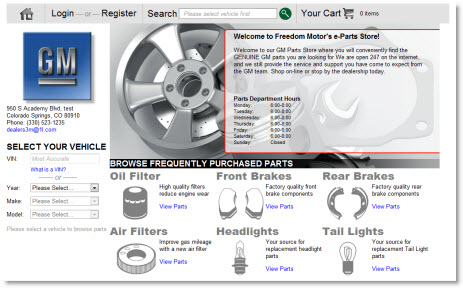
Design 2
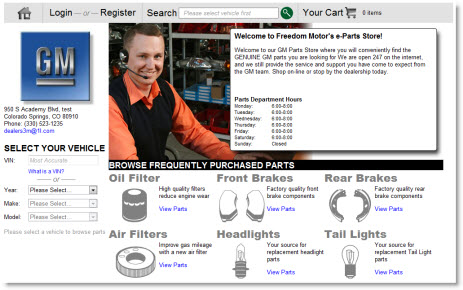
Design 3
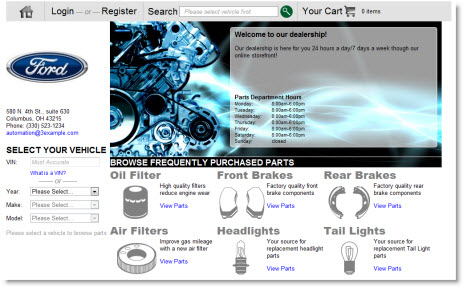
Design 4
Design 5
Design 6
Design 7
Design 8
Design 9
Design 10
Design 11
Design 12
Design 13
Design 14
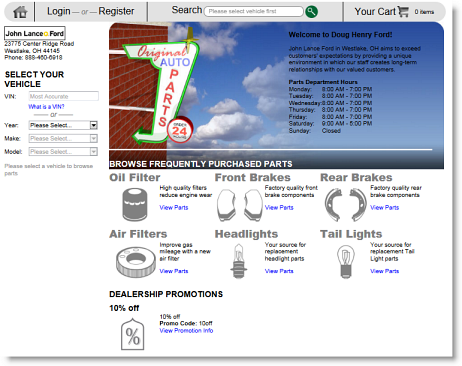
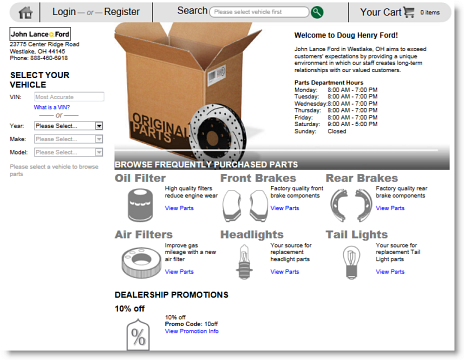
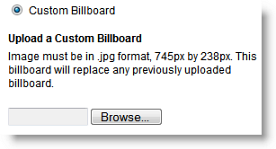
Custom Billboard
To apply a custom banner image, click the Custom Billboard button and then click Browse to locate the image on your computer. The image you select must be a .jpg image and of the size 745 pixels X 238 pixels. The image file size must not be larger than 256 kilobytes (KB).
The banner image will display in the background--the heading, welcome text, and parts department hours will appear in front of the banner image.Note: OEC recognizes that the professional appearance of your ConsumerLink Store is important to your business, therefore, we have provided an additional library of stock images that you can use for your banner.
- Type a Heading Text. This will be text that displays near the top of the page (larger than the rest of the text on the page). For example: Welcome to Bailey Automotive!.
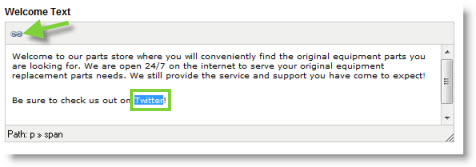
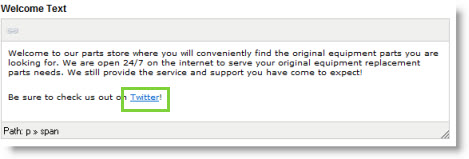
- Type your Welcome Text. This can be more detailed information about your parts department. For example: "Bailey Automotive in Richfield, OH aims to exceed customers' expectations by providing a unique environment in which our staff creates long-term relationships with our valued customers." Note: Welcome text can be a maximum of 400 characters.
- If desired, you can add hyperlinks (links to other web pages) directly into the Welcome Text. Use this to link to your social media sites (Twitter, Facebook, LinkedIn, or Google+) or other dealer pages (such as accessories) that you want to promote. To add a hyperlink:
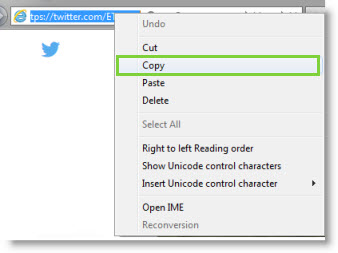
- Open the site or social media account you want to create a link for.
- Copy the URL that displays in the browser address bar.
- In the Welcome Text box, type the text you wish to use as the link.
- Highlight the text that will be converted to a link.
- Click the Insert icon.
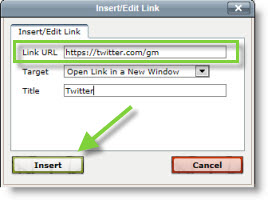
- Paste the webpage URL into the Link URL field.
- Click Insert.
- The links will display (in blue) within the Welcome Text box.
- Verify that the Dealer Branding box is checked.
- Click Save.
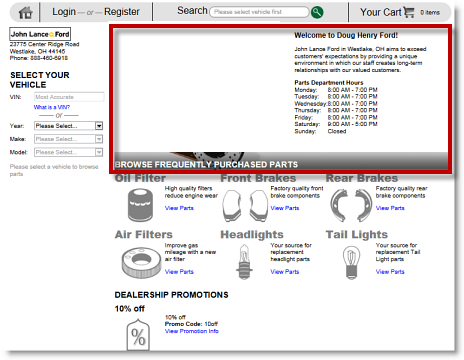
Information that is configured in the Store Template window will display on your storefront in the following locations: