KB Article #772
If your dealership uses a UCS Dealer Management System (DMS), OEC can receive parts inventory information from your dealership's DMS for use in our solutions. Important: Please keep in mind that the instructions below are designed to act as guide. Variations such as system software updates, site-specific system customization, etc. may not be reflected in these instructions. For specific information on report generation, please contact your UCS representative for assistance.
Information is extracted out of a UCS system by running certain reports against the UCS database, saving those reports as .txt files, and then uploading the reports to OEC. Select a topic below:
Step 1: Creating your UCS Report
To configure a new UCS report for OEC:
- From your UCS Home Page, click Applications.

- Click Options and then click Parts.
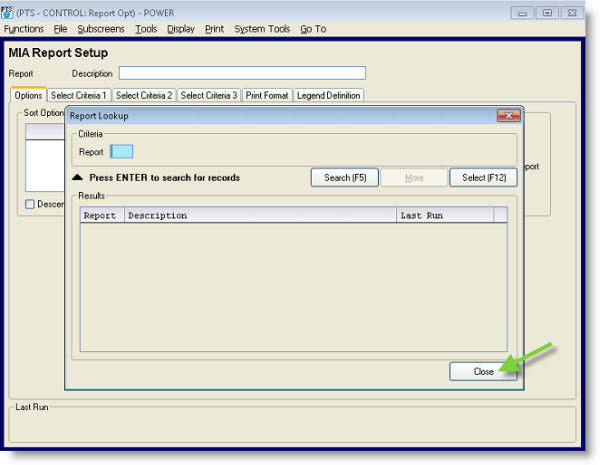
- The PTS Control window will display, click MIA Report Setup.

- The MIA Report Lookup window will display. Click Close to create a new report.
- Click File and then Add Record.

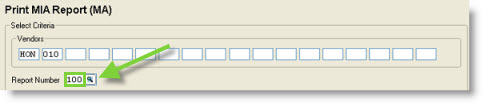
- Type a Report number in the field provided (Example: 100). Note: Reports in the system cannot have the same number.

- Click Add.
- Type OEC Stock Parts in the Description field.

- From the Options tab, select Part Number from the Sort Field drop-down.

- Under Special Report Options, leave all boxes unchecked.
- Click the Select Criteria 1 tab and verify all fields are blank.

- Click the Select Criteria 2 tab.

- Select No from the Non-Stock drop-down.
- Click the Select Criteria 3 tab.

- Verify all fields on this screen are blank.
- Click the Print Format tab.
- Use the Add button to move the following fields to the Selected Fields box in the order listed below. (If any fields are already present in the Selected Fields box, use the Remove button to delete.)
- Part
- Source
- On-Hand
- Outstanding
- Entry
- Last Sale Date
- 12 Month Sales
- Type the following field character size in the Length box for each field:
- Part: 20
- Source: 2
- On-Hand: 4
- Outstanding: 4
- Entry: 8
- Last Sale Date: 8
- 12 Month Sales: 4
- Use the icon to select the appropriate data type from the Edit box:

- Part: C
- Source: UT
- On-Hand: LT
- Outstanding: LT
- Entry: D/
- Last Sale Date: D/
- 12 Month Sales: LT
- Click Add (or press F12 on the keyboard) to save the new report.

Step 2: Scheduling your UCS Report
Note: An administrator level account is required to set up automatic reports.
To schedule your inventory report to run each night:
- Click Go To
- Click Home Page.
- From your UCS Home Page, click Reports.
- Under Report Access, type MA in the Job ID box.

- Type the Report Number you gave the OEC report in the provided field and click the search icon.
- Under Job Information, type the following in the provided fields:

- Date: &DD (This will allow the data on the report to automatically update daily.)
- Copies: 01
- Check the Run at Night box.
- Click Save Auto-Report.

- The Auto-Report Detail window will display. Note: If this does not display, the user is not a UCS admin. Add the following:

- Run Hour: 9
- Days: Check the Sunday, Monday, Tuesday, Wednesday, and Thursday boxes.
- Click Update. Your UCS report will now automatically run each night.
Submitting Your Inventory File to OEC
After preparing your DMS to export the inventory file in the required format, the inventory file must be uploaded to the OEC. Note: Files that are larger than 95MB are not accepted.
To upload your file:
- From UCS, open ERM.
- Click the Completed Reports tab to view your reports.

- Locate your OEC report and then double click to open.
- Click File.

- Click Save and select Local PC from the drop-down.
- Your file will download to your UCS system's preconfigured folder. This is typically either the C:\Ucc\Download or the C:\Ucc\Pcattach folder. Open this folder to view your files.
- Double click the file.

- The Open with window will display. Locate Notepad from the program list and then click to select.

- Click OK.
- Click File and then Save As.

- Verify that the file name matches what was provided by OEC.

- Type .txt after the file name.
- Click Save.
- The .TXT version of your file will be saved.

- Open a new Windows Explorer window.
- Type ftp://ftp.OEConnection.com in the address line and press the ENTER key.

- The Log On As window will display. Type or copy and paste the User name and Password provided by OEC Customer Support into the fields provided.

- Check the Save Password box so Windows Explorer will remember the user name and password you logged in with.
- Click Log On. If you have logged into the FTP site successfully you should see a blank area display on the right-hand pane of the Windows Explorer window.
- Locate the saved inventory file you exported out of your DMS and use one of the methods below to upload your file:
- Option 1: Copy and paste the file into the area shown.
- Option 2: Drag and drop the file into the area shown.
- When your file is uploaded, it will display in the area shown. Note: You will not be able to delete or change the file after it is uploaded.

- Click the X in the upper right-hand corner to close Windows Explorer and disconnect from the OEC FTP site. Your inventory files should be available within the hour.
To ensure dealers have access to your latest stock, be sure to send this file every day!